I am working on a new tutorial that is taking me a bit longer than I anticipated. It is often a challenge to find interesting projects for a CAD tutorial. Functional, mechanical parts are often uninteresting unless you need to create them for your day job. My goal for this tutorial was to explore additional sketcher, spreadsheet, pad, and packet techniques along with a discussion of sketch attachment positions. So I created a partially parameterized model for building marble mazes.
I have also attached the FreeCAD file. I do not claim to be a FreeCAD expert, often I explore a subject just before I create a tutorial. My skill is in trying to make this stuff easier for people to understand. So feel free to comment on the model. Your comments will probably overlap with my filming and may not make it into the video but I will direct my viewers here to learn more.
Please excuse my Covid hair and beard. Time to get out my clippers or mask up and go for a haircut.
All the best. Let’s continue to learn together. Irv
I would define the (wall)holes onto the labyrinth walls. You change the ball size and boom, they are off my miles.
With a distance (or constrain on a circular line) and an angle you could roughly give the holes a fixed location, so the parametric feature works better. Even better would be a track width multiplier. So you create a hole at “spreadsheet.trackwidth*3.5” and you have a proper hole dead center in ring 4 and the angle defines the position in the ring. Wall holes work the same, just with full number multiplier
This way when changing the ball diameter, the track width will change and walls and holes will jump to proper positions Creating the very same labyrinth (as just defined number of holes and opening and their angles) just smaller or bigger.
I know this is probably to much for a plain beginner model, but would be a nice example the beginner can learn how power full parametric modelling can be.
Same would be working for the blocking walls. Just define the center of these walls in an fixed distance from the center of the labyrinth and done.
A small side note: Not using units in spreadsheet can and will cause trouble in the future. Especially when combining sketch measurements which have always e.g. “mm” and you add a non unit value from spreadsheet, it will fail.
Ok, I made a fully parametric model. Well, not 100% as adding additional rings and obstacles would need additional work. However sizes like height of the plate, wall sizes and ball size can be specified.
If you want less holes like in your model, simply open the sketch for the holes and convert the white lines into helper lines, this way you can switch them on and off. Same goes for the obstacle walls. It makes no sense for the gateways unless you add more.
The position is defined by an angle, where 0 is the right hand x axis and then counter clockwise. Just make sure the labyrinth is solvable as there is of course no check to make it fool prove.
@Geit You are absolutely correct. My challenge was producing a beginner model that does not require complex trigonometry and is both fully constrained and fully parametric. I failed to find a way to do this. So I took the approach of using a parametric approach to the rings, to then explaining that fully defining the. model is beyond the scope of this video.
I look forward to loading up your model and taking a look. Thanks for all of your contributions to the community and your very timely contributions to this video. I expect to shoot the video tomorrow.
You have inspired me so I may think about constraining the positions of the holes relative to the walls before I film.
@Geit Thank you. You motivated me to improve the model. For folks following this topic the keys to moving the model forward which I will highlight in the video I hope to film tomorrow include:
The model is much easier to constrain since all of the geometry is constrained around the origin.
In addition to horizontal and vertical constraints FreeCAD has the ability to “fix the length of a line” which can be used between any two points or lines. This is used to fix the distance from the origin to the holes. This constrains a hole to a position on a wall or in the track.
At least for me the easiest way to constrain the position of a hole around a track is to create two construction lines. One on the X-axis and a second between each hole and the origin. Then it is very easy to create an angle constraint between the X construction axis and the line bisecting the hole.
The model attached now supports changing the ball size in the spreadsheet and the holes all stay in the correct track. I ran out of time (really to be honest out of energy) so I have not yet constrained all of the holes to the positions on a track.
Geit’s model has clearer labels so to learn the most make sure you look at both.
My sketches are getting a little overloaded with five objects in each.
It would have been better to create a sketch for each object so one can clear see what is going on and where. One mayor problem of current FreeCAD compared to Fusion360 are the visuals. You are constantly fighting the measurements and their positions. Especially when zooming.
It’s great to see the collaboration between you guys. Your synergy is obviously leading to a better end product. The power of teamwork is always inspiring & yet, somehow, still surprising to me.
That is the whole idea of building a community. Makers helping makers. Did some more work on my version and I am finalizing what I can reasonably teach in a video that is 30 minutes or less. Starting to film in about an hour.
P.S. I will increase the FreeCAD file limit to 2MB.
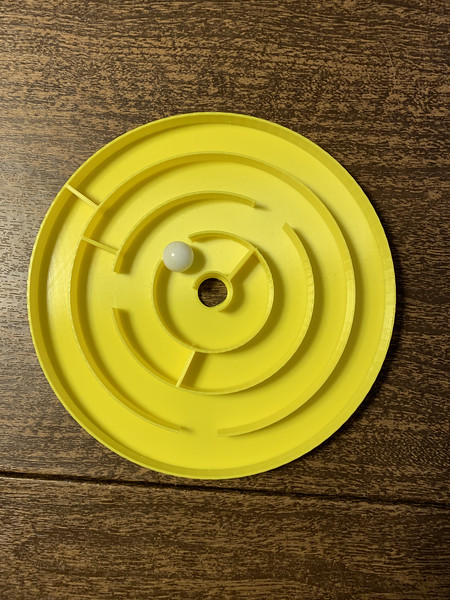
Printed the original version for my 2 1/2 yr old great granddaughter. After trying it decided it would be to hard for her with the balls dropping out. So I made a couple of design changes by eliminating the holes in the bottom and closed the hole to the outside. I’ll save the 1st one until she’s older.
Good idea @Gramps. She should find it challenging enough to get the ball into the center to drop through the hole. 'Course, as 2 yr olds are wont, she’ll probably just pick up the marble & drop it through the hole.