I just had the size too big. It works now.
Just make sure you have the height & width ratio correct, so you can resize, if needed, to what you need to fit the lamp. You can do that scaling in the slicer.
I ran into a snag with the way this lamp was designed. It only left a 2 mm slot to retain the lithophane and lithophanes should be more like 3.5 or you lose detail.
I am presently printing a panel of clear pla filament 1 mm thick of which there will be 4 if the system works and then just glue a lithophane to this backing. I tried to get fancy and bevel the edges all around in Tinker cad but it can’t work with such large files. I do remember in his demonstration photo there was no lithophane in the lamp just white plastic. It is unfortunate because it all fits together very nicely and should make a good lamp. I’m still waiting for the three I ordered to come so I can test it.
I’m not sure about needing 3.5 to 4 mm thickness. The “backplane” of the 1 of John Lithgow I posted earlier is almost exactly 2mm thick, and I think it looks pretty good. Certainly, you need more thickness for the “relief” portion of the image, but 2mm seems pretty good for the backplane. Maybe, before you start doing a lot of workarounds you could try one with a 2mm backplane?
I need the border 5 mm all around to be 2 mm thick. The details definitely need more. How can I achieve this. I’m not sure what you mean by back plane. It depends on the photo.
Imagine you located the very back edge of the relief part of the litho. If you were to slice the relief part of the litho off cleanly, what you would have left is a piece of PLA of uniform thickness. That’s why I’m calling the backplane; the part of the litho that isn’t really part of the actual image. If you look at the one of John Lithgow, it would be the part all around his head. That’s where the litho is 2mm thick.
In the lithophane app on 3dp.rocks, in the Settings, there is an option to add a border. If you say you need a 5mm border in order to fit the lamp, add a 6mm or 7mm border to the photo, just to be safe. I’m not sure how you specify thickness of the border but, if I have time, I’ll try a download to see how it looks.
I did that but I’m not sure why the border would be 2 mm.
Just to clarify, I meant the board to be 2mm thick. And, I agree, I’m not sure why it would be either. That’s why I said I’ll try to download some sample files and see how they look in the slicer. I wonder if there exists a slicer that can give measurements of the model?
The border always comes out the maximum thickness, if it could be inverted it would work. I have my lights and using a one mm backing to glue the lithophane to, works fine. It will be a nice little lamp.
OK, after considerable testing, I think I may have something:
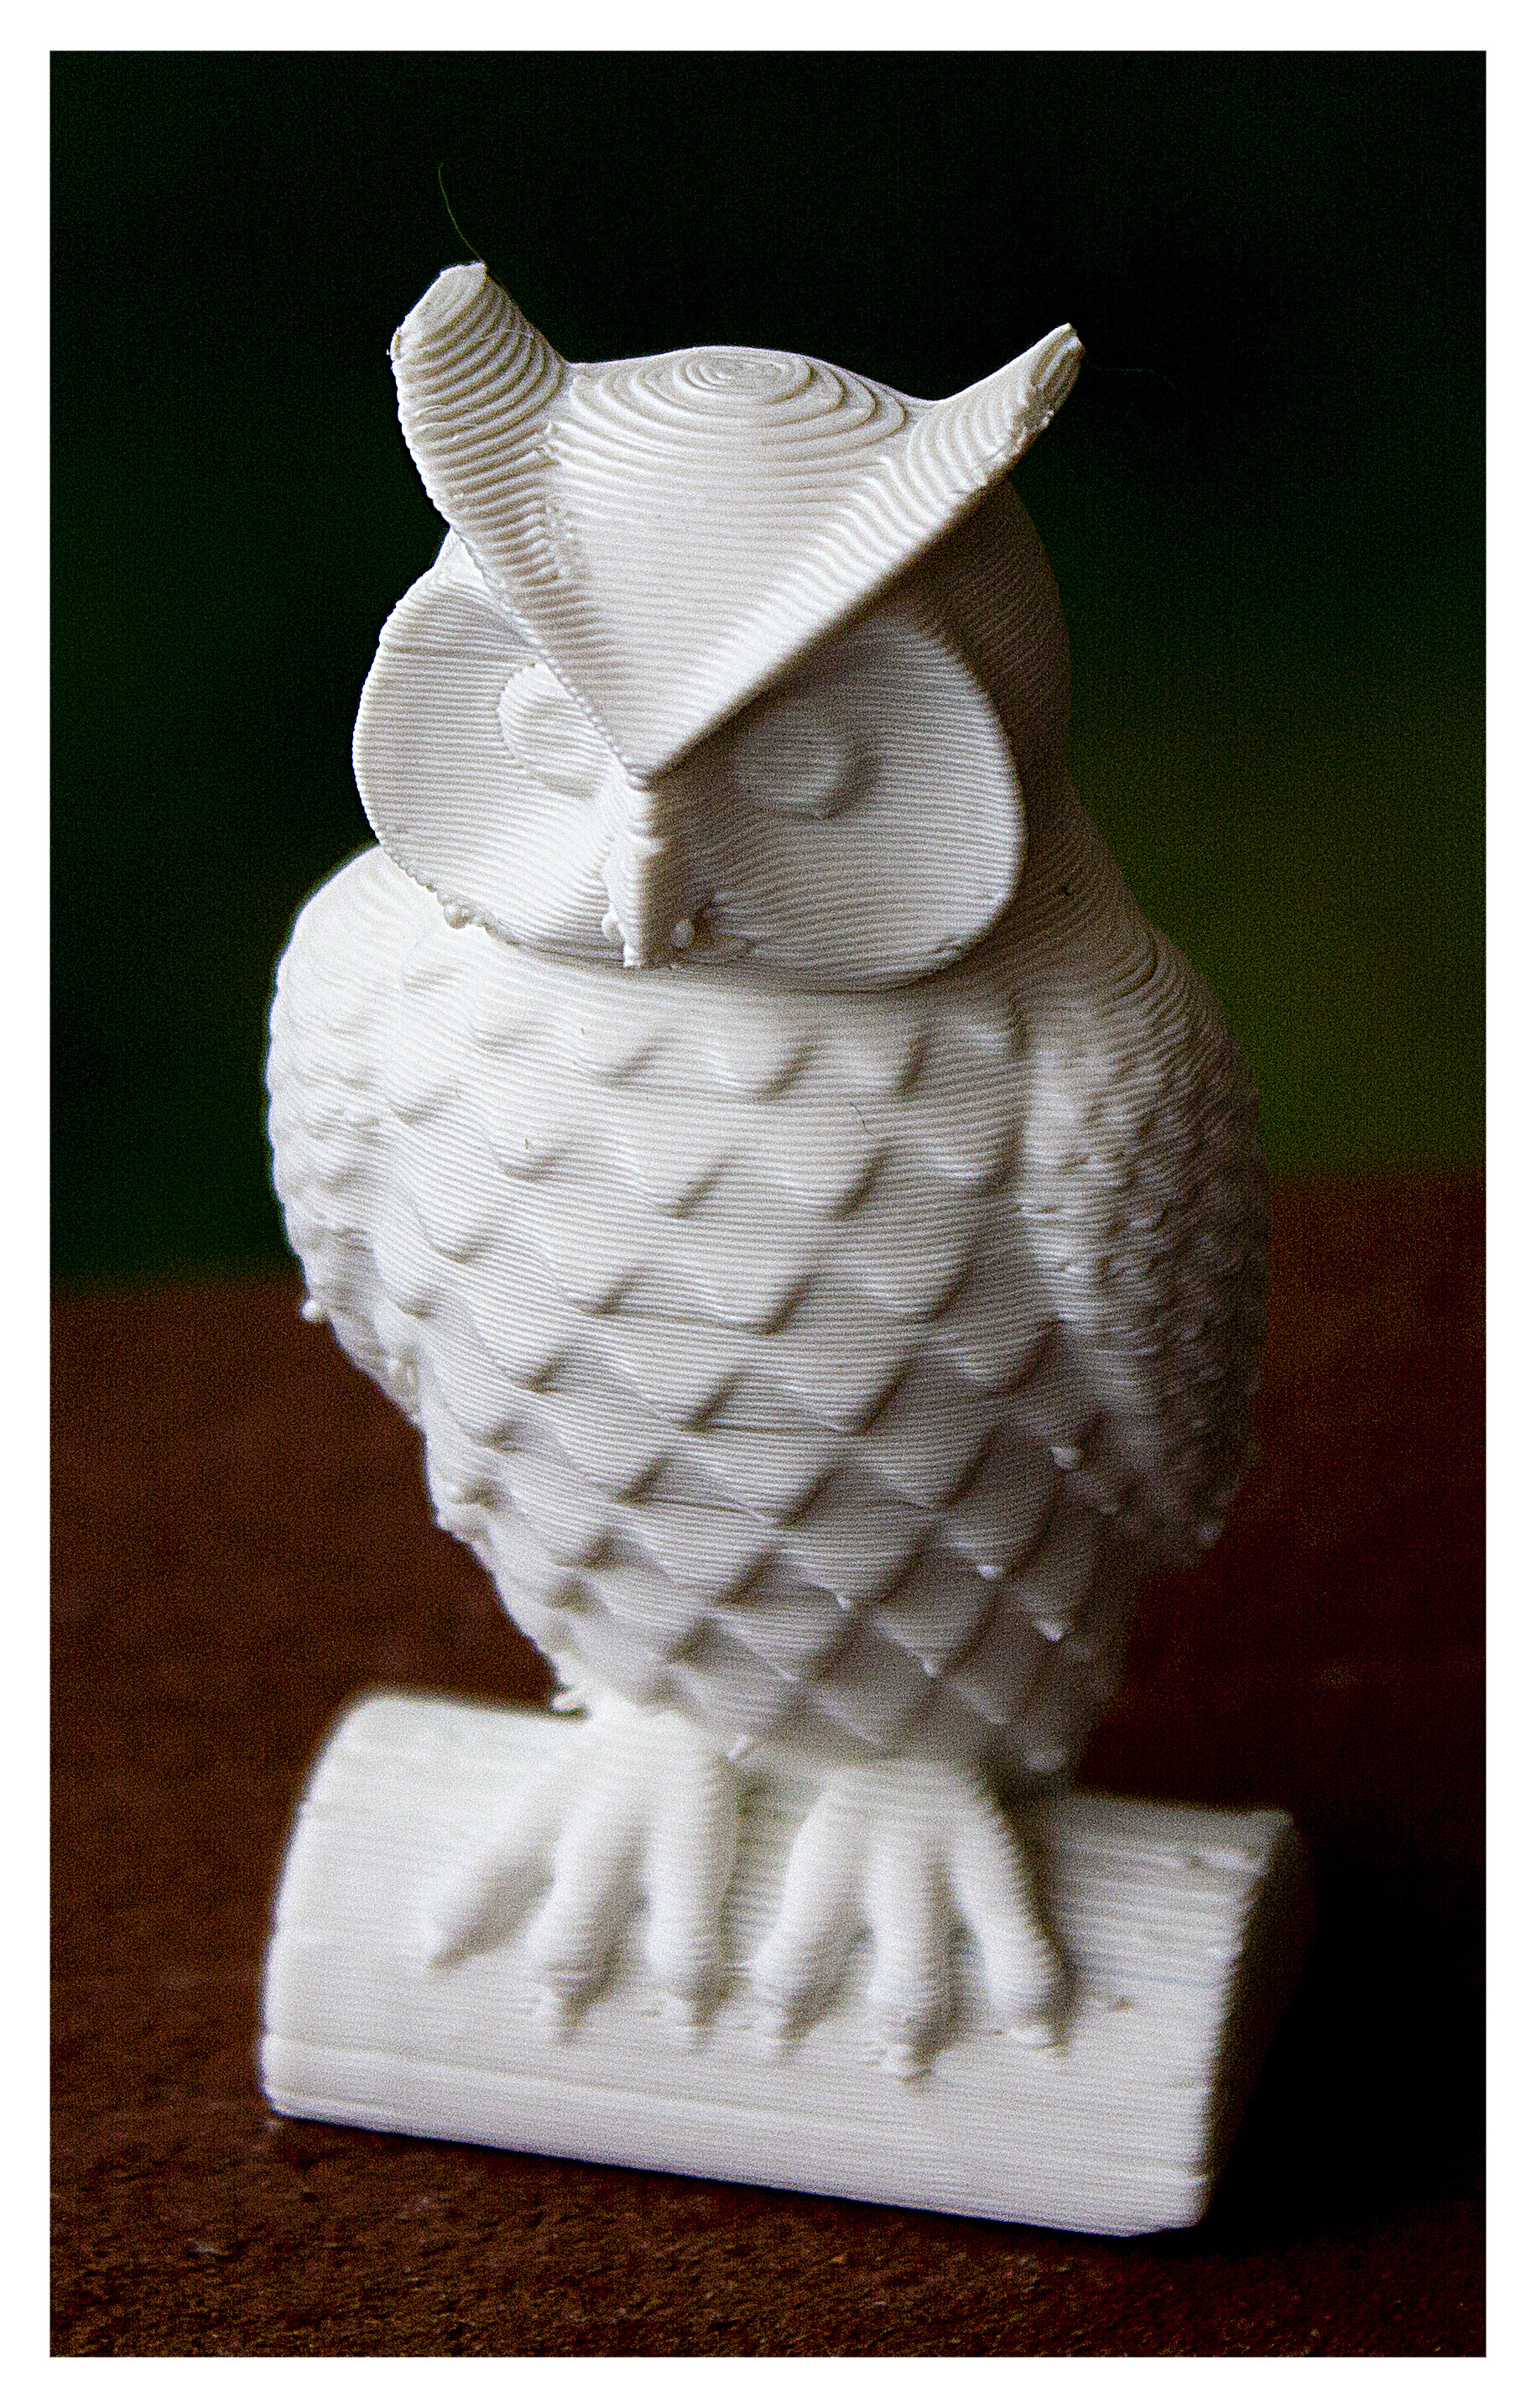
1st, here is the image I used to test:
[ATTACH=JSON]{“alt”:“Click image for larger version Name: Owl-2.4in-front-with5mmWhiteBorder.jpg Views: 0 Size: 6.44 MB ID: 2375”,“data-align”:“none”,“data-attachmentid”:“2375”,“data-size”:“custom”,“height”:“207”,“width”:“132”}[/ATTACH]
Interestingly, the fact that it has a black/dark background screwed me up for a while, but that’s another story.
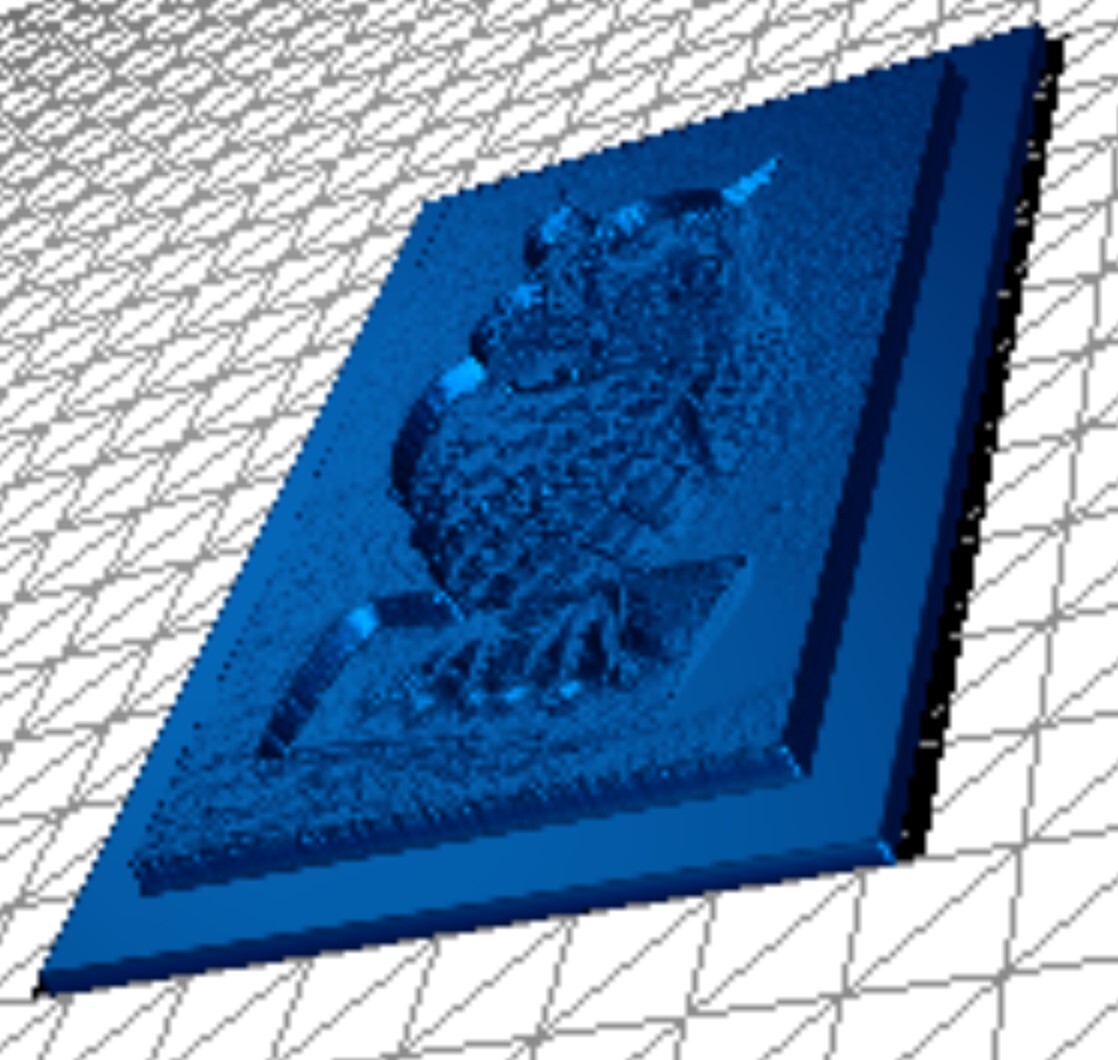
2nd, here is the image as shown in 3DP.Rocks/lithophane:
[ATTACH=JSON]{“alt”:“Click image for larger version Name: Owl-2.4in-front-with5x2mmWhiteBorder_3DP.Rocks.jpg Views: 0 Size: 175.4 KB ID: 2376”,“data-align”:“none”,“data-attachmentid”:“2376”,“data-size”:“custom”,“height”:“228”,“width”:“240”}[/ATTACH]
Looking at the image, you can see that it has a thin border. That border is 5mm wide. In MeshMixer I measured it as 2mm thick.
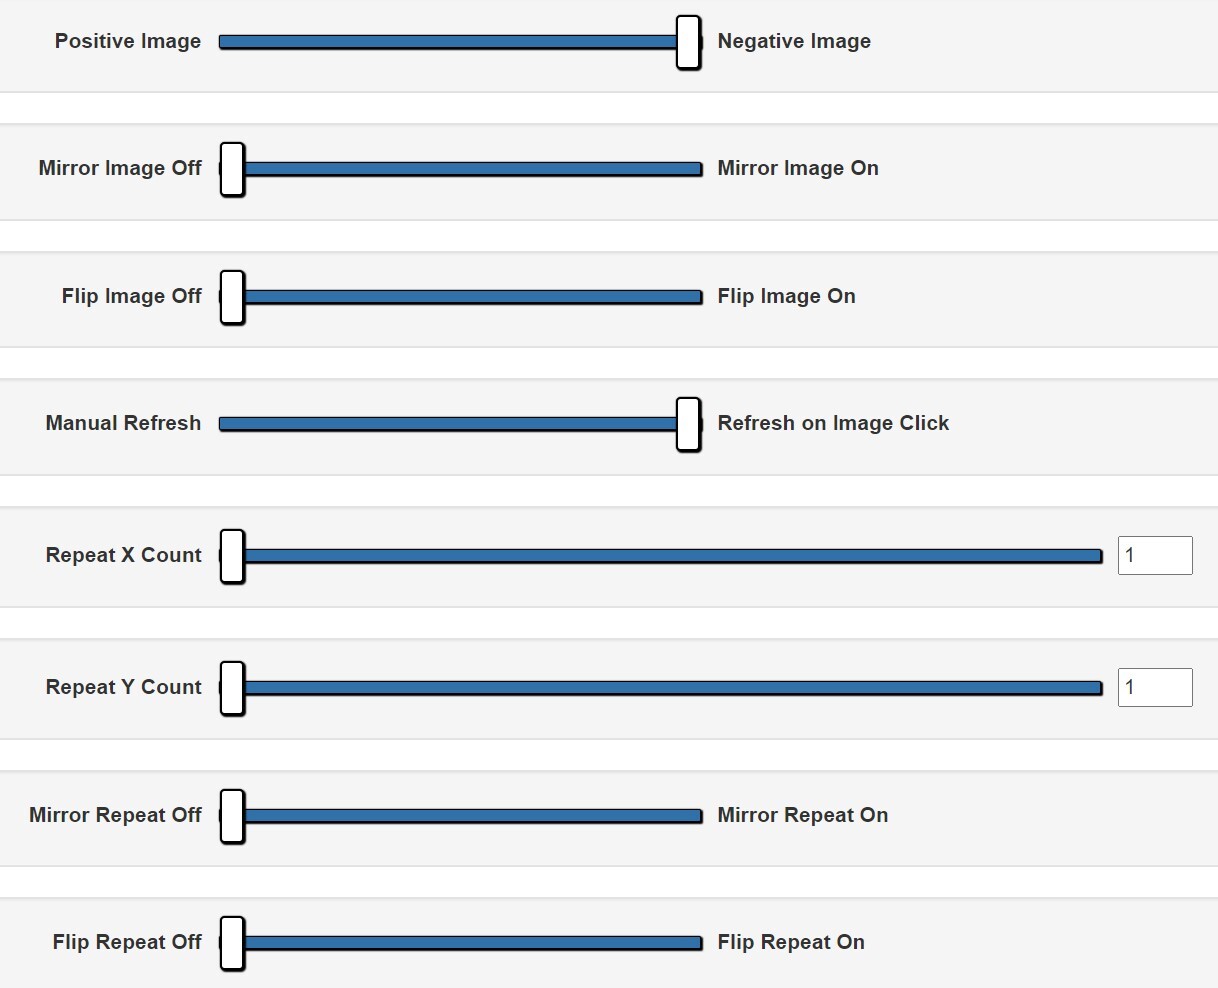
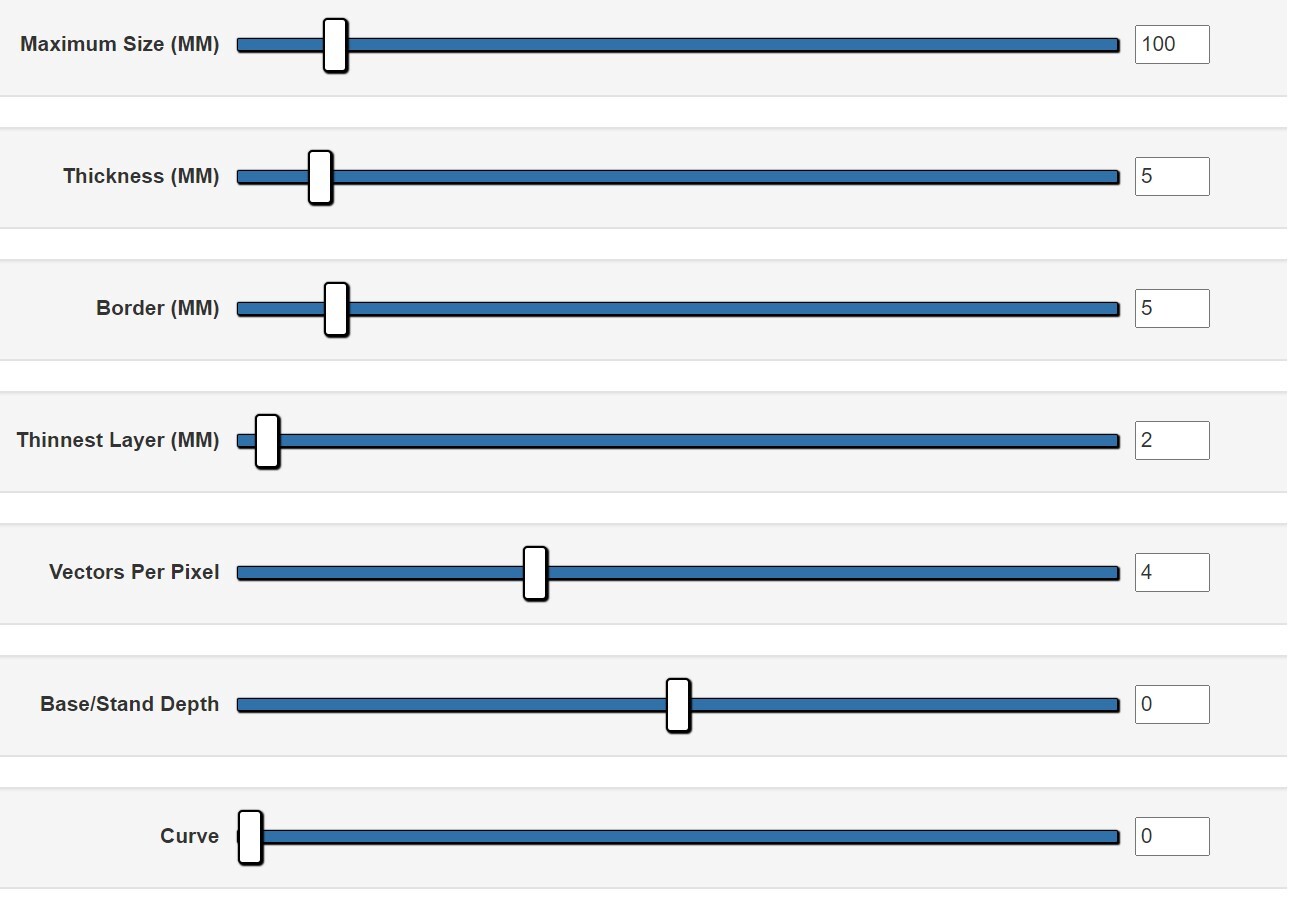
Here are the Image & Model settings:
IMAGE SETTINGS…MODEL SETTINGS
[ATTACH=JSON]{“alt”:“Click image for larger version Name: theOwlLitho5mmThick2mmMin5mmBorder-ImageSettings.jpg Views: 0 Size: 88.7 KB ID: 2377”,“data-align”:“none”,“data-attachmentid”:“2377”,“data-size”:“custom”,“height”:“257”,“width”:“317”}[/ATTACH][ATTACH=JSON]{“alt”:“Click image for larger version Name: theOwlLitho5mmThick2mmMin5mmBorder-ModelSettings.jpg Views: 0 Size: 87.3 KB ID: 2378”,“data-align”:“none”,“data-attachmentid”:“2378”,“data-size”:“custom”,“height”:“257”,“width”:“368”}[/ATTACH]
OK, this gets a little complicated. I had to rely on my photography knowledge from back in the 70s (I co-owned a wedding photo studio from 1978 to 1981). Look at the area around the owl: i.e. the “background”. Notice that it is the thickest area. That means it will block the most light when lit from behind, which will lead to it being the darkest on the lithophane. Looking at the photo of the owl, you can see that the area around the owl is black, so the photo & litho match: i.e. they both are dark.
Now, notice that, in the image settings, the 1st item is set to Negative Image. This is important. If the litho was to be lit from the front, it would need to be set to Positive Image to look correct. But, since it’s to be lit from behind, by a light source, it needs to be set to Negative Image.
I don’t think you need to change any of the other settings in Image Settings. In Model Settings I believe there are a number of items you will need to set: [LIST=1]
You will also have to be very careful to get the ratio of width & height of your photo correct. The actual size doesn’t matter so much (you can scale up & down later: in the slicer for example). What matters is the proportions. Thingiverse says the lamp uses lithos that are 156mm x 104mm x 2mm, with the 156mm being the height. That makes the ratio of height to width 1.5:1, which is exactly the same as a 6x4 photo.
OK, I think that’s all I can think of at the moment.
I am totally impressed. My brain doesn’t function normally so I will digest this slowly but I want to thank you very much.
I have sort of a background in photography from an amateur point of view. My older brother set up a dark room in 1955 with stuff a friend of my dad’s gave to him from the RCMP photo lab.
When I was in high school my friend and I took and developed all the pictures for the yearbook except for the portrait photos. It was my get out of jail free card from classes I didn’t wish to attend.
I’m glad to hear you have some photography background. That will make it easier, I think, for you to ‘get’ the negative/positive aspects. I have found that this is difficult for many people to truly grasp. I admit, it took me a while in the early days.
Tell me about your experiences with lithophanes. I was not aware of this when I worked in a darkroom. What material did you produce the lithophane on? I think classicly they used to be carved into a shell of some mollusk.
Sorry for the confusion; I meant it’s hard for many people to grasp the idea of negative and positive imagery. They often can’t grasp how a negative will look as a positive. As far as lithophanes are concerned, my total experience is the one of John Lithgow. Heck, I hadn’t even heard the word lithophane until I started into 3D printing, which I find totally odd. How could I not have at least heard of them after all these years?
The advantage of knowing something about photography, especially having worked a ton with film negatives, is that it gave me an understanding of how negative imagery would apply to lithophanes. Lucky break ![]()
It’s always interesting to look at a negative B/W and try to guess how it will look when it is printed. I can’t say that I can see a lot more than anyone else yet I worked with many over the years and had many amateur darkrooms.
If I understand you correctly I need to put white border around the picture so that it will process the groove when it produces the lithophane. That makes sense to me. I have to use Gimp on my Mac. I’m new to mac and Gimp. I used photoshop on windows till I had to stop making web sites a few years ago. I should be able to figure it out.
That’s pretty much it. If you’ve used PS I don’t think you’ll have any trouble using Gimp. The white border, when treated as a negative image, should get processed to the thickness of the Thinnest Layer setting.
I had to set it on positive image to make it work. I agree that it should be a negative but it seems to be fine. I am printing it now.
I struggled a bit finding my way around gimp but a little practice should help.
That really seems odd. Looking at the STL that I downloaded, I could swear the thickest part was the background, which is black.
OK, I just checked 3 different sites, one that talks about 3DP.Rocks, and they all say you should set the image to negative. I’m interested to see how yours turns out.