I agree that the Pi camera works well on a Pi 3 or 4. I have 4 running and can monitor the status, not a perfect picture, but am thinking of moving them to get a better view. I have $10 invested in each one and never had any problems
You have some good points. Do whatever works for you. I think we all agree that having access to your printer via a camera and status readout is very helpful
Absolutely. I also find it kind of handy to be able to easily see the camera in 1 browser window and fluiddPi in another.
Thats a very good point.!!
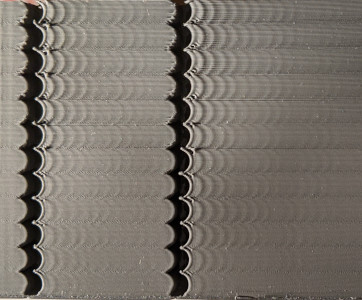
A couple of posts with photos showing the result of Input Shaping and Pressure Advance tuning (I received my ADXL345 boards yesterday, wired them up, and used them to do the Input Shaping). The photos are of a model that’s specifically designed to showing ringing (ghosting/rippling).
[ATTACH=JSON]{“alt”:“Click image for larger version Name: _MG_4034.jpg Views: 1 Size: 935.8 KB ID: 12565”,“data-align”:“none”,“data-attachmentid”:“12565”,“data-size”:“medium”}[/ATTACH] [ATTACH=JSON]{“alt”:“Click image for larger version Name: 12 Resonance Compensation - Klipper documentation.jpg Views: 1 Size: 35.0 KB ID: 12566”,“data-align”:“none”,“data-attachmentid”:“12566”,“data-size”:“custom”,“height”:“151”,“width”:“182”}[/ATTACH]
The left photo is of the outside of the Y axis on my Ender 5 Pro. On the right is a shot from the Klipper documentation that shows a good example of ringing.
[ATTACH=JSON]{“alt”:“Click image for larger version Name: _MG_4035.jpg Views: 1 Size: 935.2 KB ID: 12567”,“data-align”:“none”,“data-attachmentid”:“12567”,“data-size”:“medium”}[/ATTACH]
An angled shot of the Y axis side.
[ATTACH=JSON]{“alt”:“Click image for larger version Name: _MG_4036.jpg Views: 1 Size: 875.1 KB ID: 12568”,“data-align”:“none”,“data-attachmentid”:“12568”,“data-size”:“medium”}[/ATTACH]
A reverse angle shot of the Y axis.
[ATTACH=JSON]{“alt”:“Click image for larger version Name: _MG_4037.jpg Views: 1 Size: 955.8 KB ID: 12569”,“data-align”:“none”,“data-attachmentid”:“12569”,“data-size”:“medium”}[/ATTACH]
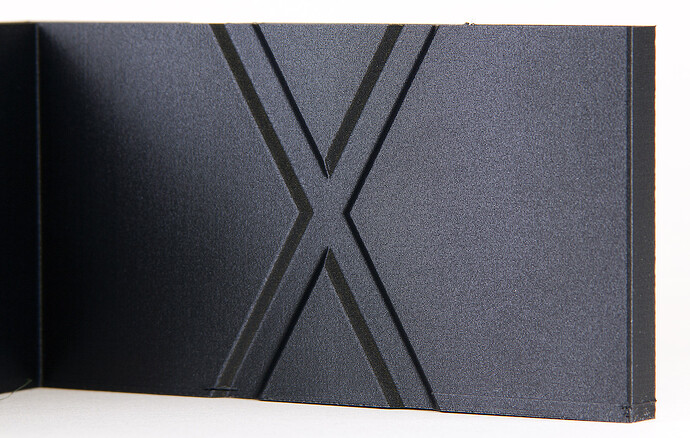
A shot of the X axis side.

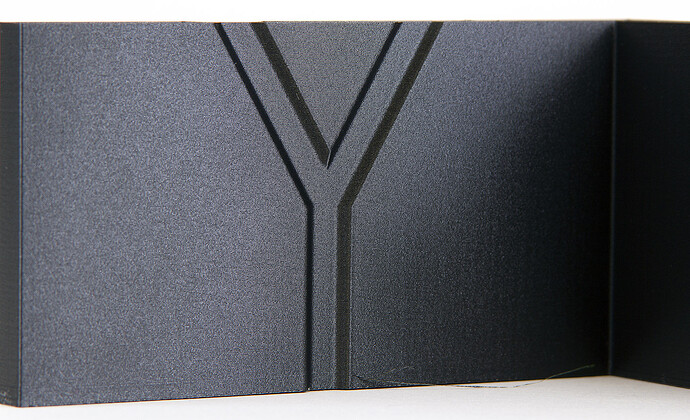
Some more shots of the ringing test model:
[ATTACH=JSON]{“data-align”:“none”,“data-size”:“medium”,“data-attachmentid”:12571}[/ATTACH]
A closer shot of the X axis side.
[ATTACH=JSON]{“data-align”:“none”,“data-size”:“medium”,“data-attachmentid”:12572}[/ATTACH]
Reverse angle shot of the X axis side.
[ATTACH=JSON]{“data-align”:“none”,“data-size”:“medium”,“data-attachmentid”:12573}[/ATTACH]
A shot of the inside of the Y axis side. Yes, the Y axis side. For some reason, the documentation says the X gets printed on the Y axis. Not sure why.
[ATTACH=JSON]{“data-align”:“none”,“data-size”:“medium”,“data-attachmentid”:12574}[/ATTACH]
The inside of the X axis side, showing the letter Y. Again, not sure why the letters on the opposite axes, but the documentation was very explicit that this is correct.
[ATTACH=JSON]{“data-align”:“none”,“data-size”:“medium”,“data-attachmentid”:12575}[/ATTACH]
A bit of an angled shot of the X on the Y axis side.
I have been very impressed with the improvements made by the Input Shape and Pressure Advance tuning. So far, Klipper has been a very pleasant surprise. Along with FluiddPi as the interface, I am basically leaving OctoPrint behind. Don’t get me wrong; I think what Gina has done with OctoPrint is fantastic, but I think Klipper has passed it by. Of course, OctoPrint is 10+ years old and Klipper is only 3 or 4 years old. The 1 thing I would like to see for Klipper right now is a plugin for Cura that allows for direct saving of sliced models to Klipper, much like the 1 that connects Cura to OctoPrint. It’s not really all that inconvenient: I just save gcode files to a shared folder on my server and then open them in FluiddPi.
Good pictures! I agree that Klipper and Fluidd is a good replacement for Marlin and Octoprint. Probably the change made by moving all of the computer work to the Pi instead of the printer board.
I like the extra features, input shaper and pressure advance and the ability to do so much with macros. I have already forgotten how to compile Marlin and using VS. I was fortunate that I never really got into the more exotic features of Octoprint, so have not seen any problems with the switch
What is a reasonable amount of time one should set aside to install, configure, and evaluate Klipper?
I know that’s hard to quantify, but for example if I had two free days, would that be fruitful, or should I wait until I have five?
Some of it depends on whether you have an accelerometer in hand, so you can do the Input Shaping. I didn’t, so I had to order and wait for it to arrive.
While waiting, I did the basic install and a Pressure Advance calibration print. That took about a day. When the ADXL345 arrived I wired it up and did the Input Shaping run. That took about another day.
I recommend watching the videos from Nero3DP: https://www.youtube.com/c/Nero3D/search?query=klipper. I would start with Klipper 3d Printer Firmware - What is it? Why do I want it? - YouTube.
Have a backup of your mainboard cnf file and your Pi files if you were runing Octoprint. Then you could revert to them. A day or so to get Klipper / Fluidd or Mainsail working and have time to test.
This morning I discovered a feature of Klipper/FluiddPi that I’d seen but not tried yet. It’s called SCREWS_TILT_CALIBRATE. Basically, it causes the printer to go to each corner of the bed, check the corner’s height using the BL Touch and then, GET THIS, it reports the Z Offset at each corner and actually gives recommendations for how far to rotate each wheel clockwise or counter-clockwise.
I ran the feature 3 times and got the corners very close to the same height. Then, I ran BED_MESH_CALIBRATE, which builds a map of the printbed that can be used to compensate for small bed differences during a print run.
I have tried that feature also, but had some challenges. I have solid spacers on a couple of my Ender 5 and can not adjust the screws. I also had the experience that the rotation was in the wrong direction, so if you use that be careful. The concept is used on my Rat Rig which has three Z axis motors which have their own drivers and are run separately. The command is Z_TILT_ADJUST.
I have three points identified that are above the Z motor points, The probe is used to measure the height above each point, after they have been measured calculations are made to adjust and the process is repeated until the specified tolerance is meet or bettered. This gets the bed plane level to the probe, then I still do a bed mesh to measure any high / low spots. I’m toying with trying this on my Ender 5 Plus using two points and adjusting the two Z Axis motors. I would have to get a new board with at least 5 drivers. It is in my when I get really board list.
I think I got the rotation correct. I pictured the wheels as if looking at them from the top, which is the reverse of how most utilities seem to view them. The distances measured by the routine did seem to get the measurements closer.
Good to hear, post an update when you are done. After using Marlin for a couple of years, and then switching to Klipper, I’m impressed with the ease of use and features. I have a filament change / filament out set of macros if you want to try them
Please post any and all macros you have. Would love to look at them. I may hit you up for info on how to create them: tips and tricks if you will.
Take a look here Klipper M600 code by woodwaker - Thingiverse
The attached file is actually my printer.cfg for my Ender 5 Plus
plus printer.txt (6.4 KB)
thx @woodwaker_dave. I hadn’t even realized Klipper is missing M600. 'Course, I don’t change colors much at all.
I use it often to change colors on layers, and it works for filament run out. One of the biggest challenges was to keep the bed on, but dial back the hot end temp. I have it tuned to my printers and the OmniaDrop direct drive - it has a manual filament feeder. I set the nozzle temp to the correct value from my Fluidd panel and when reached feed the filament in manually then hit resume from Fluidd
I presume you’re using purge towers?
I don’t use purge towers. Using the M600 command on a layer change starts a process that moves the nozzle to a specified position and backs the filament out of the nozzle. You then manually switch colors - and start printing with the new color. There are a number of steps in the process, but that is how it works. This is based on colors being on top of other colors, but you see the top layer in specific color - here are some examples
Let me know if you want more specifics on how it works


