Flashforge Creator 2

I am beginning my review of the Flashforge Creator 2. It is a massive device built like a safe and about as heavy. I expect the relatively small build volume combined with a very heavy and rigid frame will result in high-quality prints. I think @Ender5r may be correct. The Flashforge is designed for people who want an appliance. The setup wizard built into the firmware is much better than the user guide and quite clear.

The printer was 95% assembled with a couple of minor items requiring a hex wrench.

When I checked the dual extruder calibration my printer was already perfect. Flashforge claims all devices are tested at the factory and my device listed 2 hours of print time when I turned it on and checked the statistics provided via the front menu.

The color touch screen is very nice and easy to use.

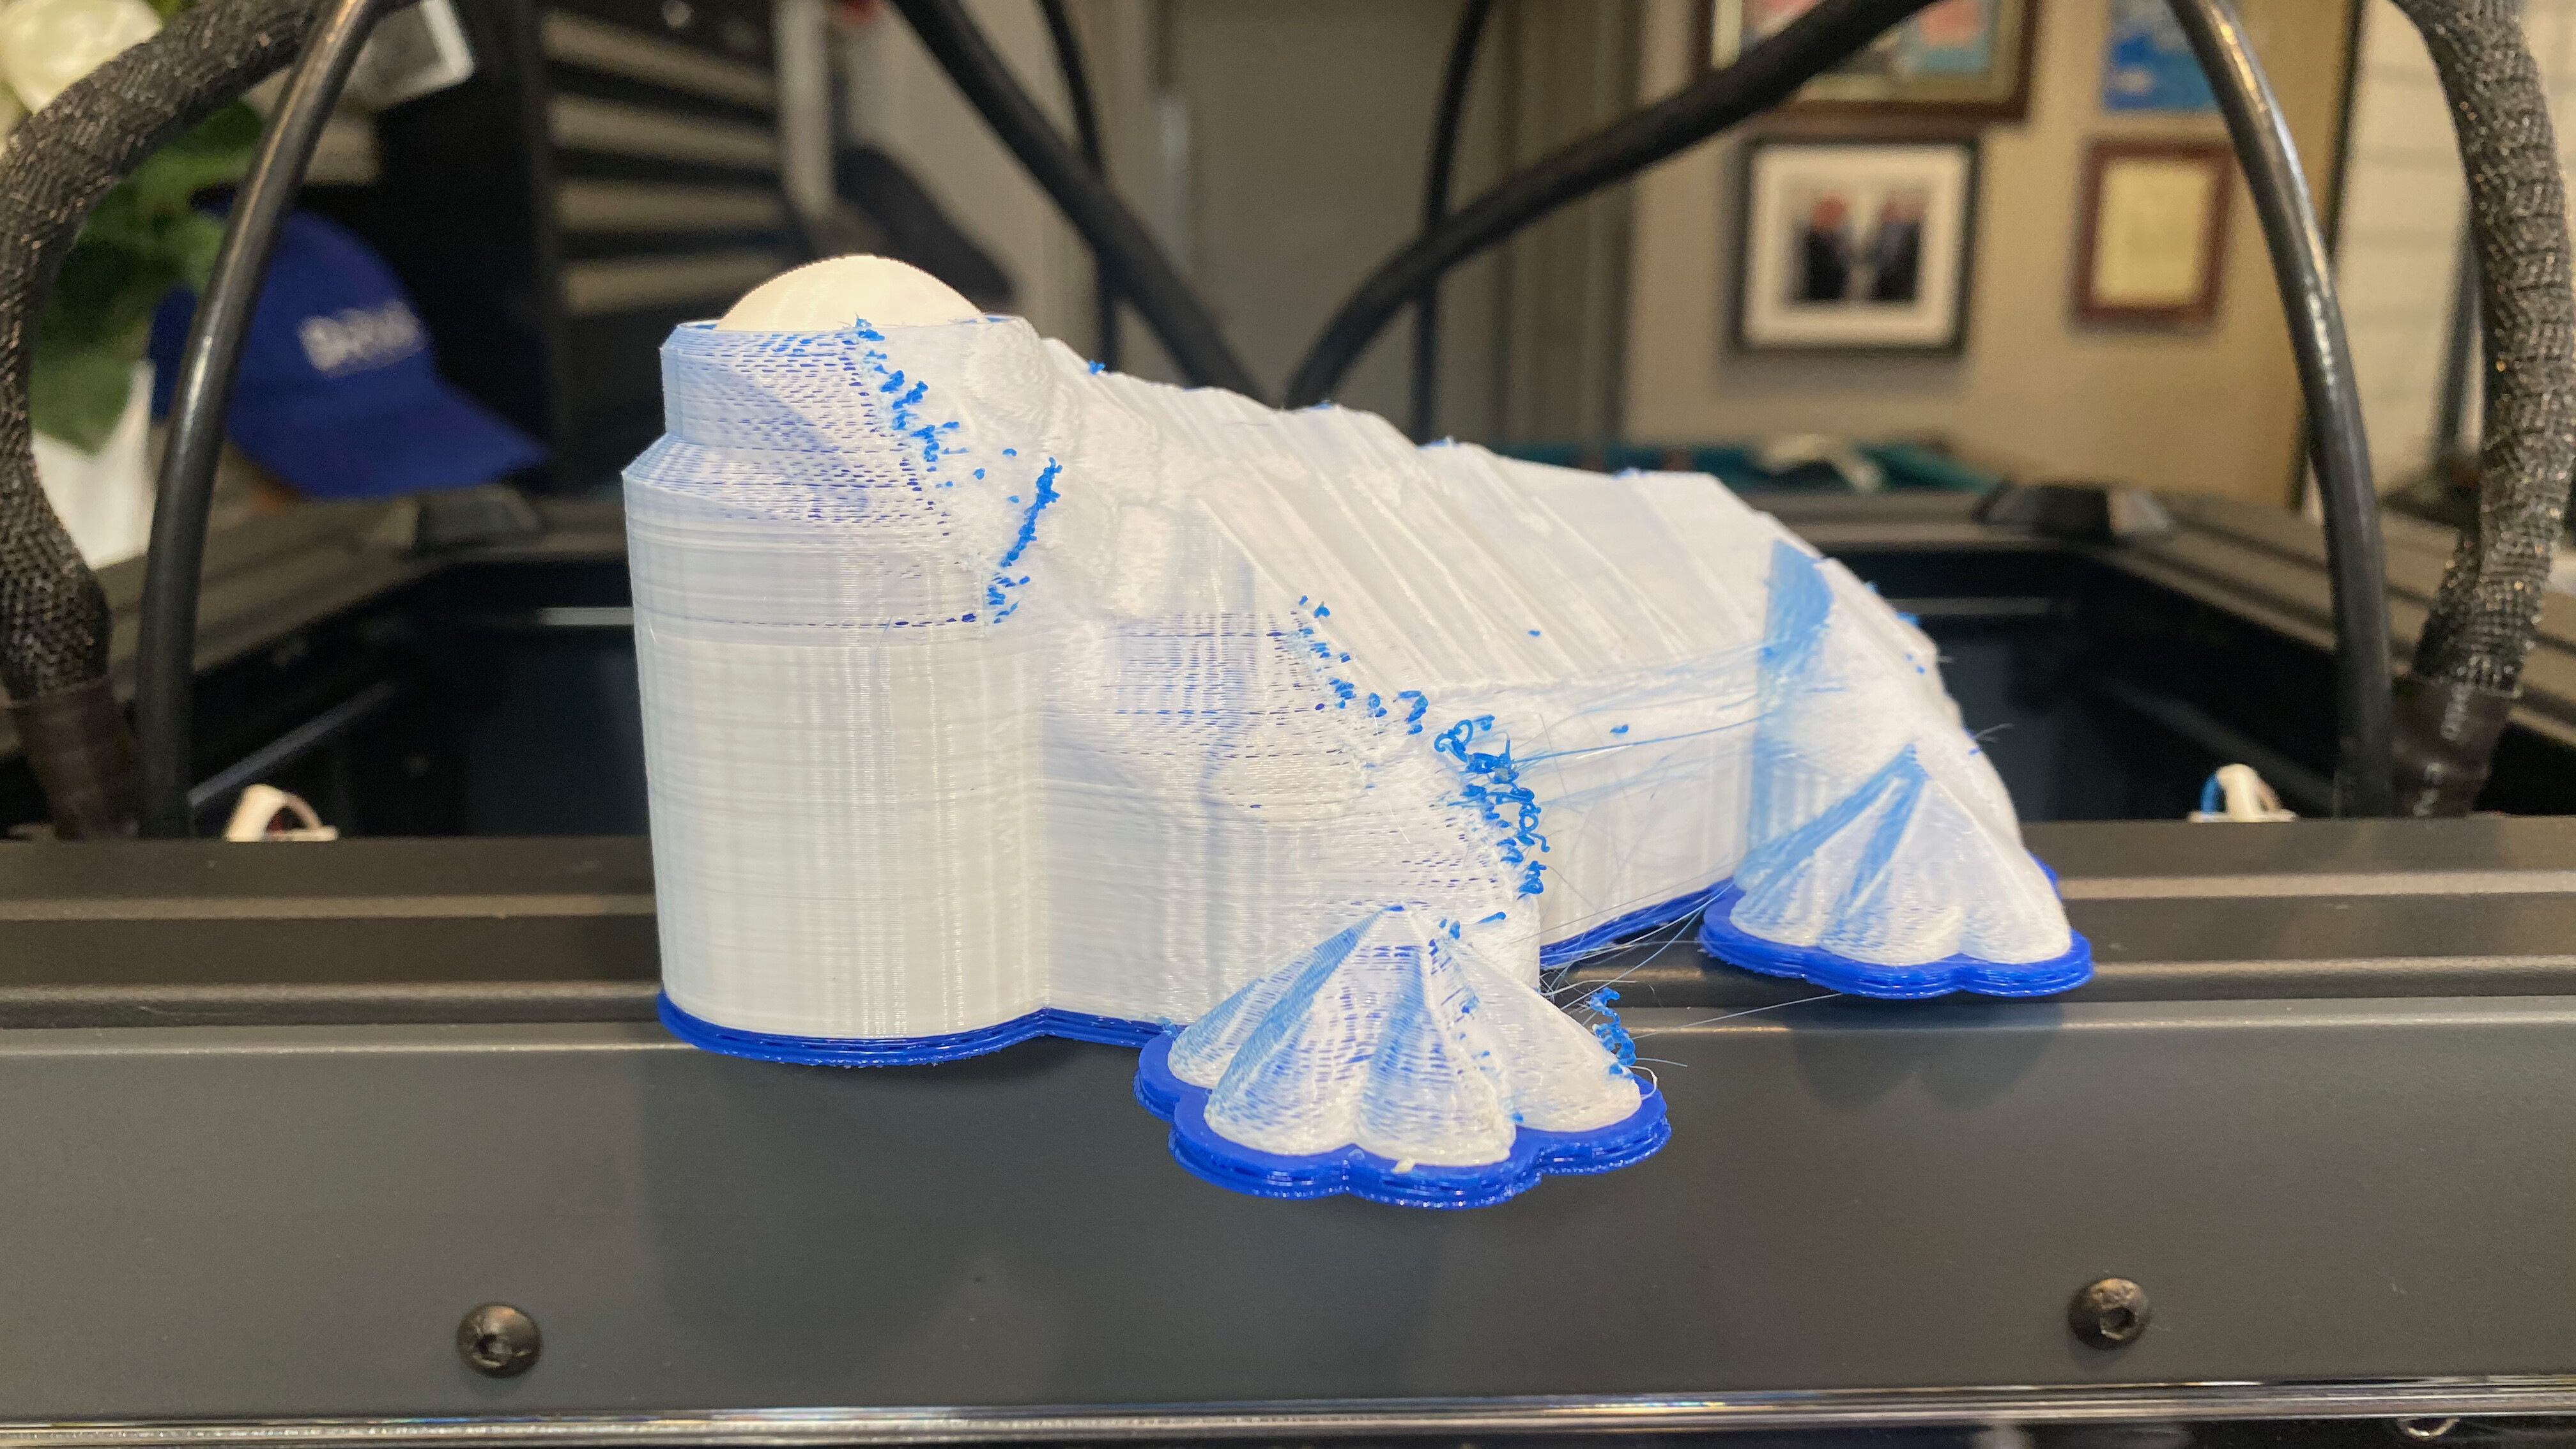
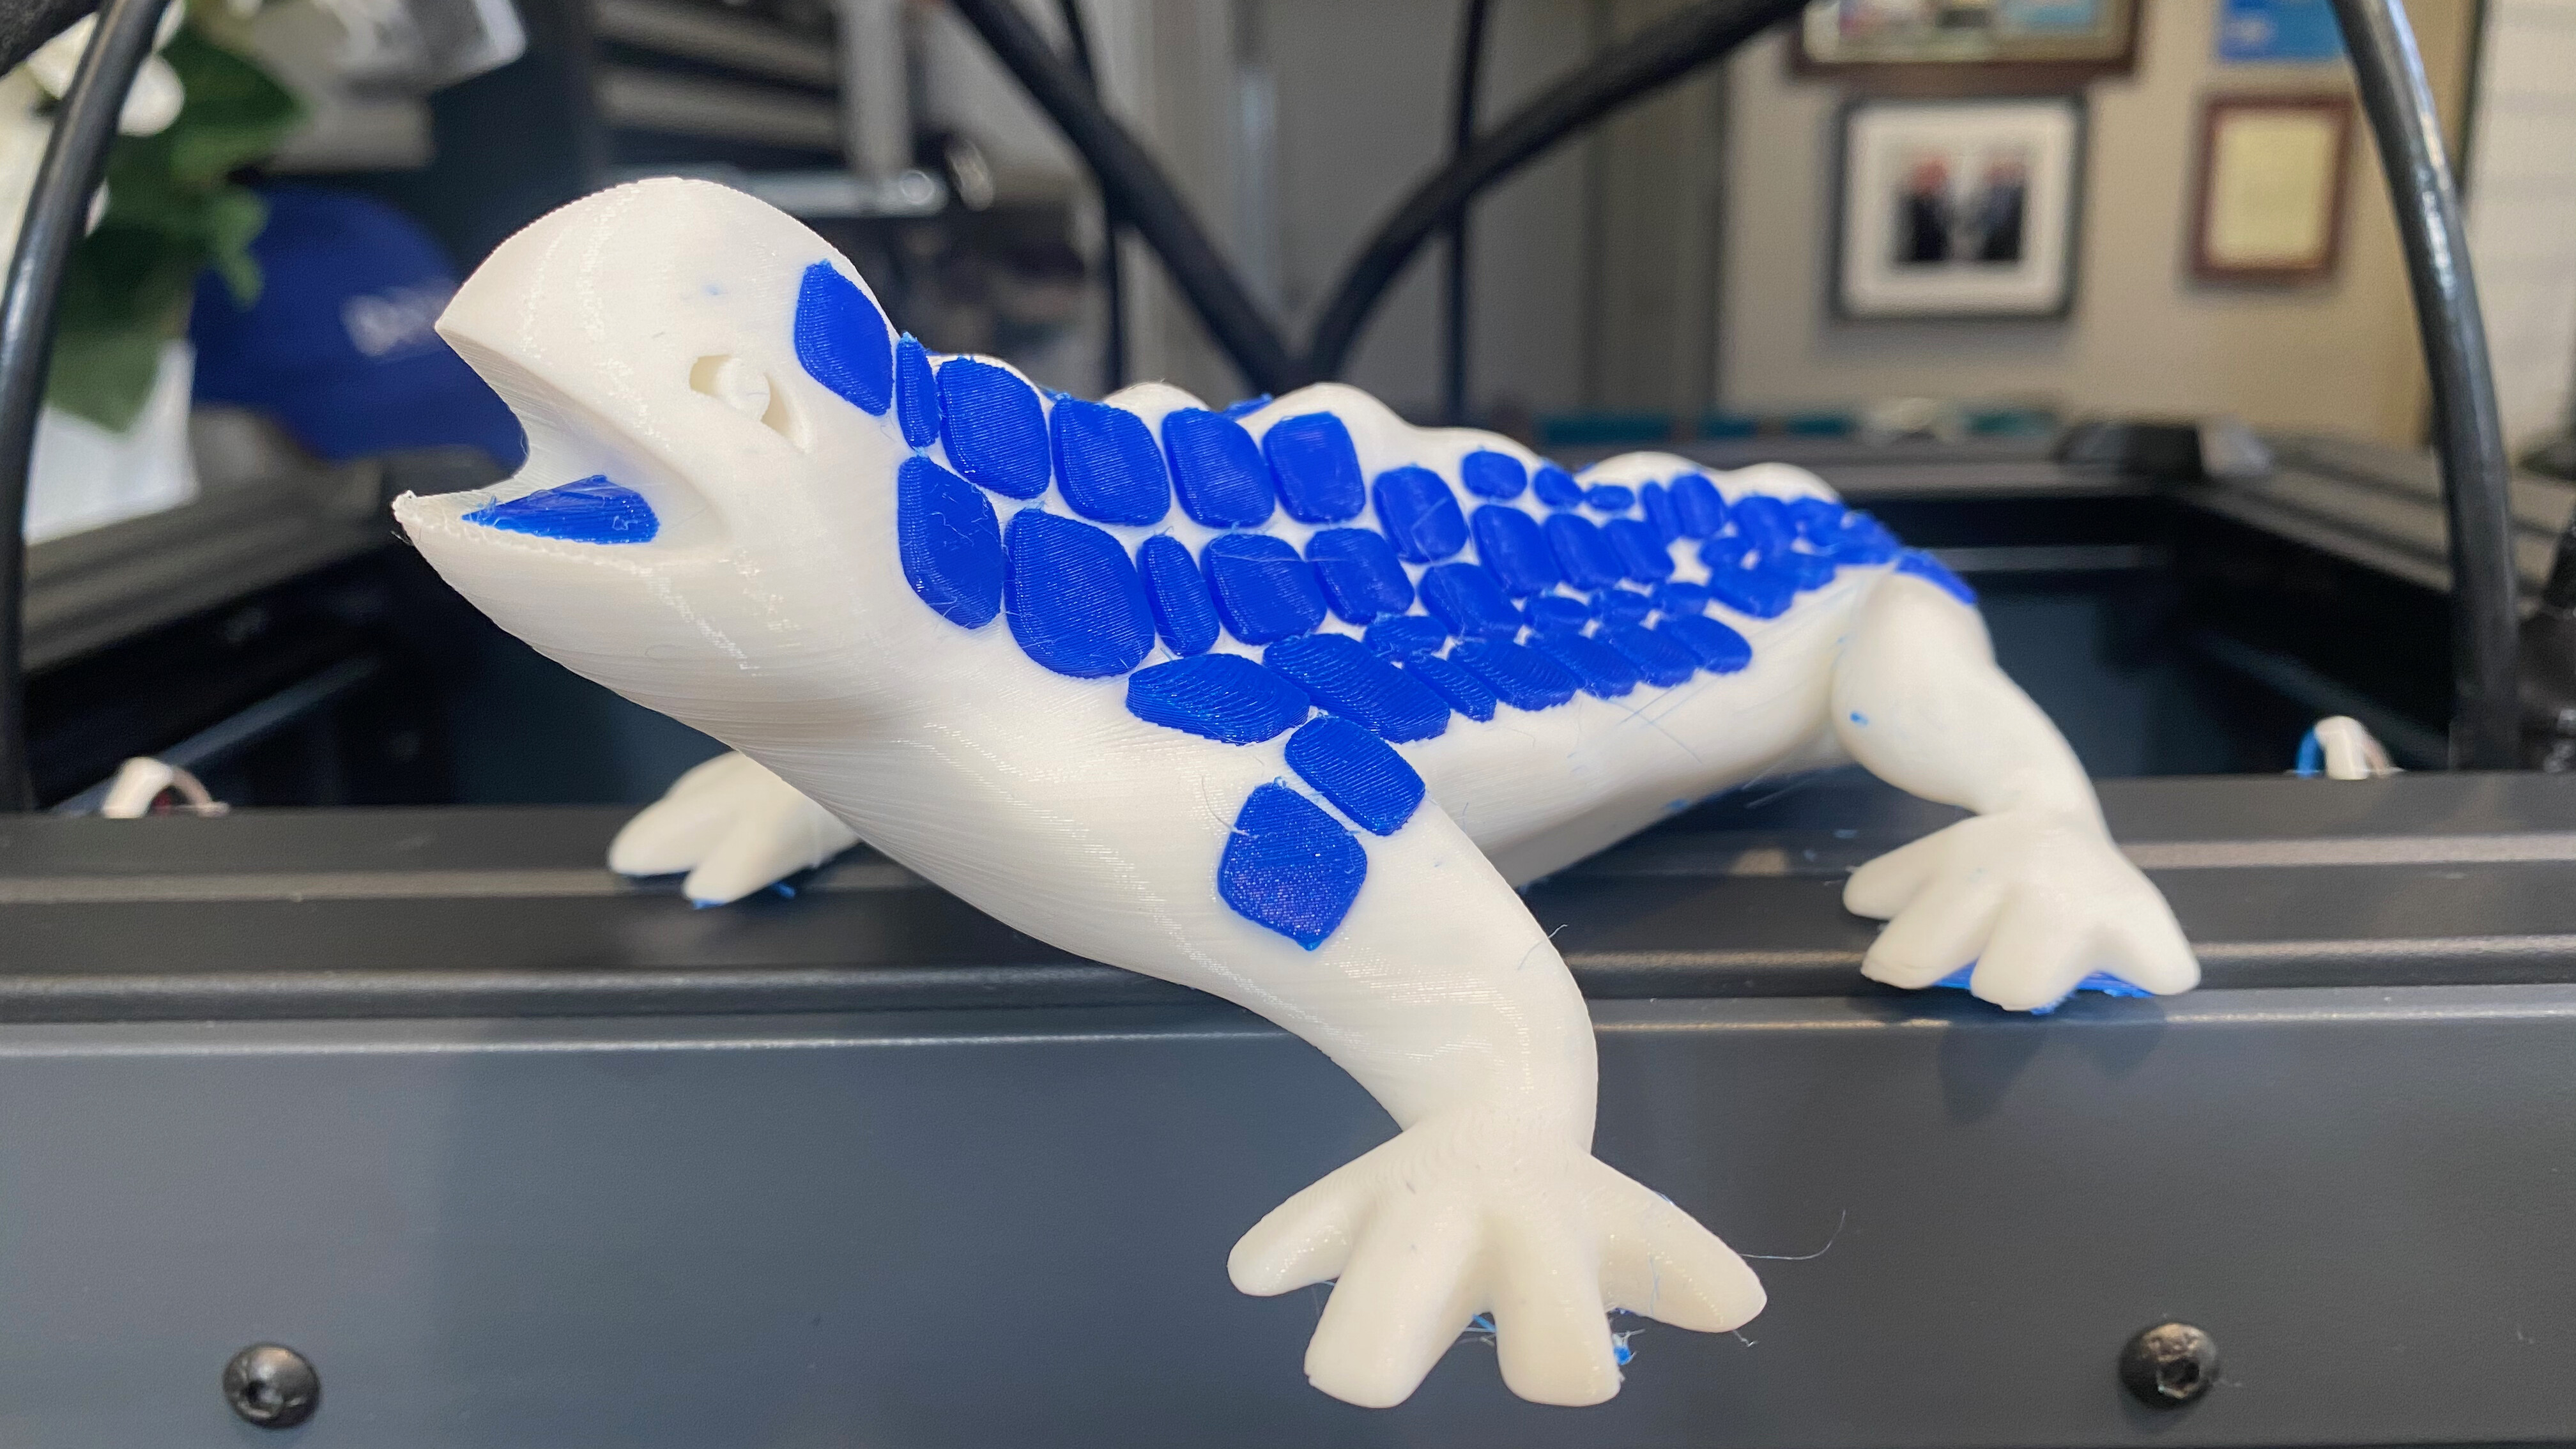
I am printing my first print from the full-size SDcard, which is estimated at over four hours. It is a two-color print, and it had an ooze wall around the print. I have not used a wall to reduce oozing, and I am very interested to see how well this works. I do expect it significantly extends the print time.

Just visually, nothing scientific, the printer seems quite fast. Flashforge may be able to ramp up the acceleration and jerk limits because the printer is quite heavy.

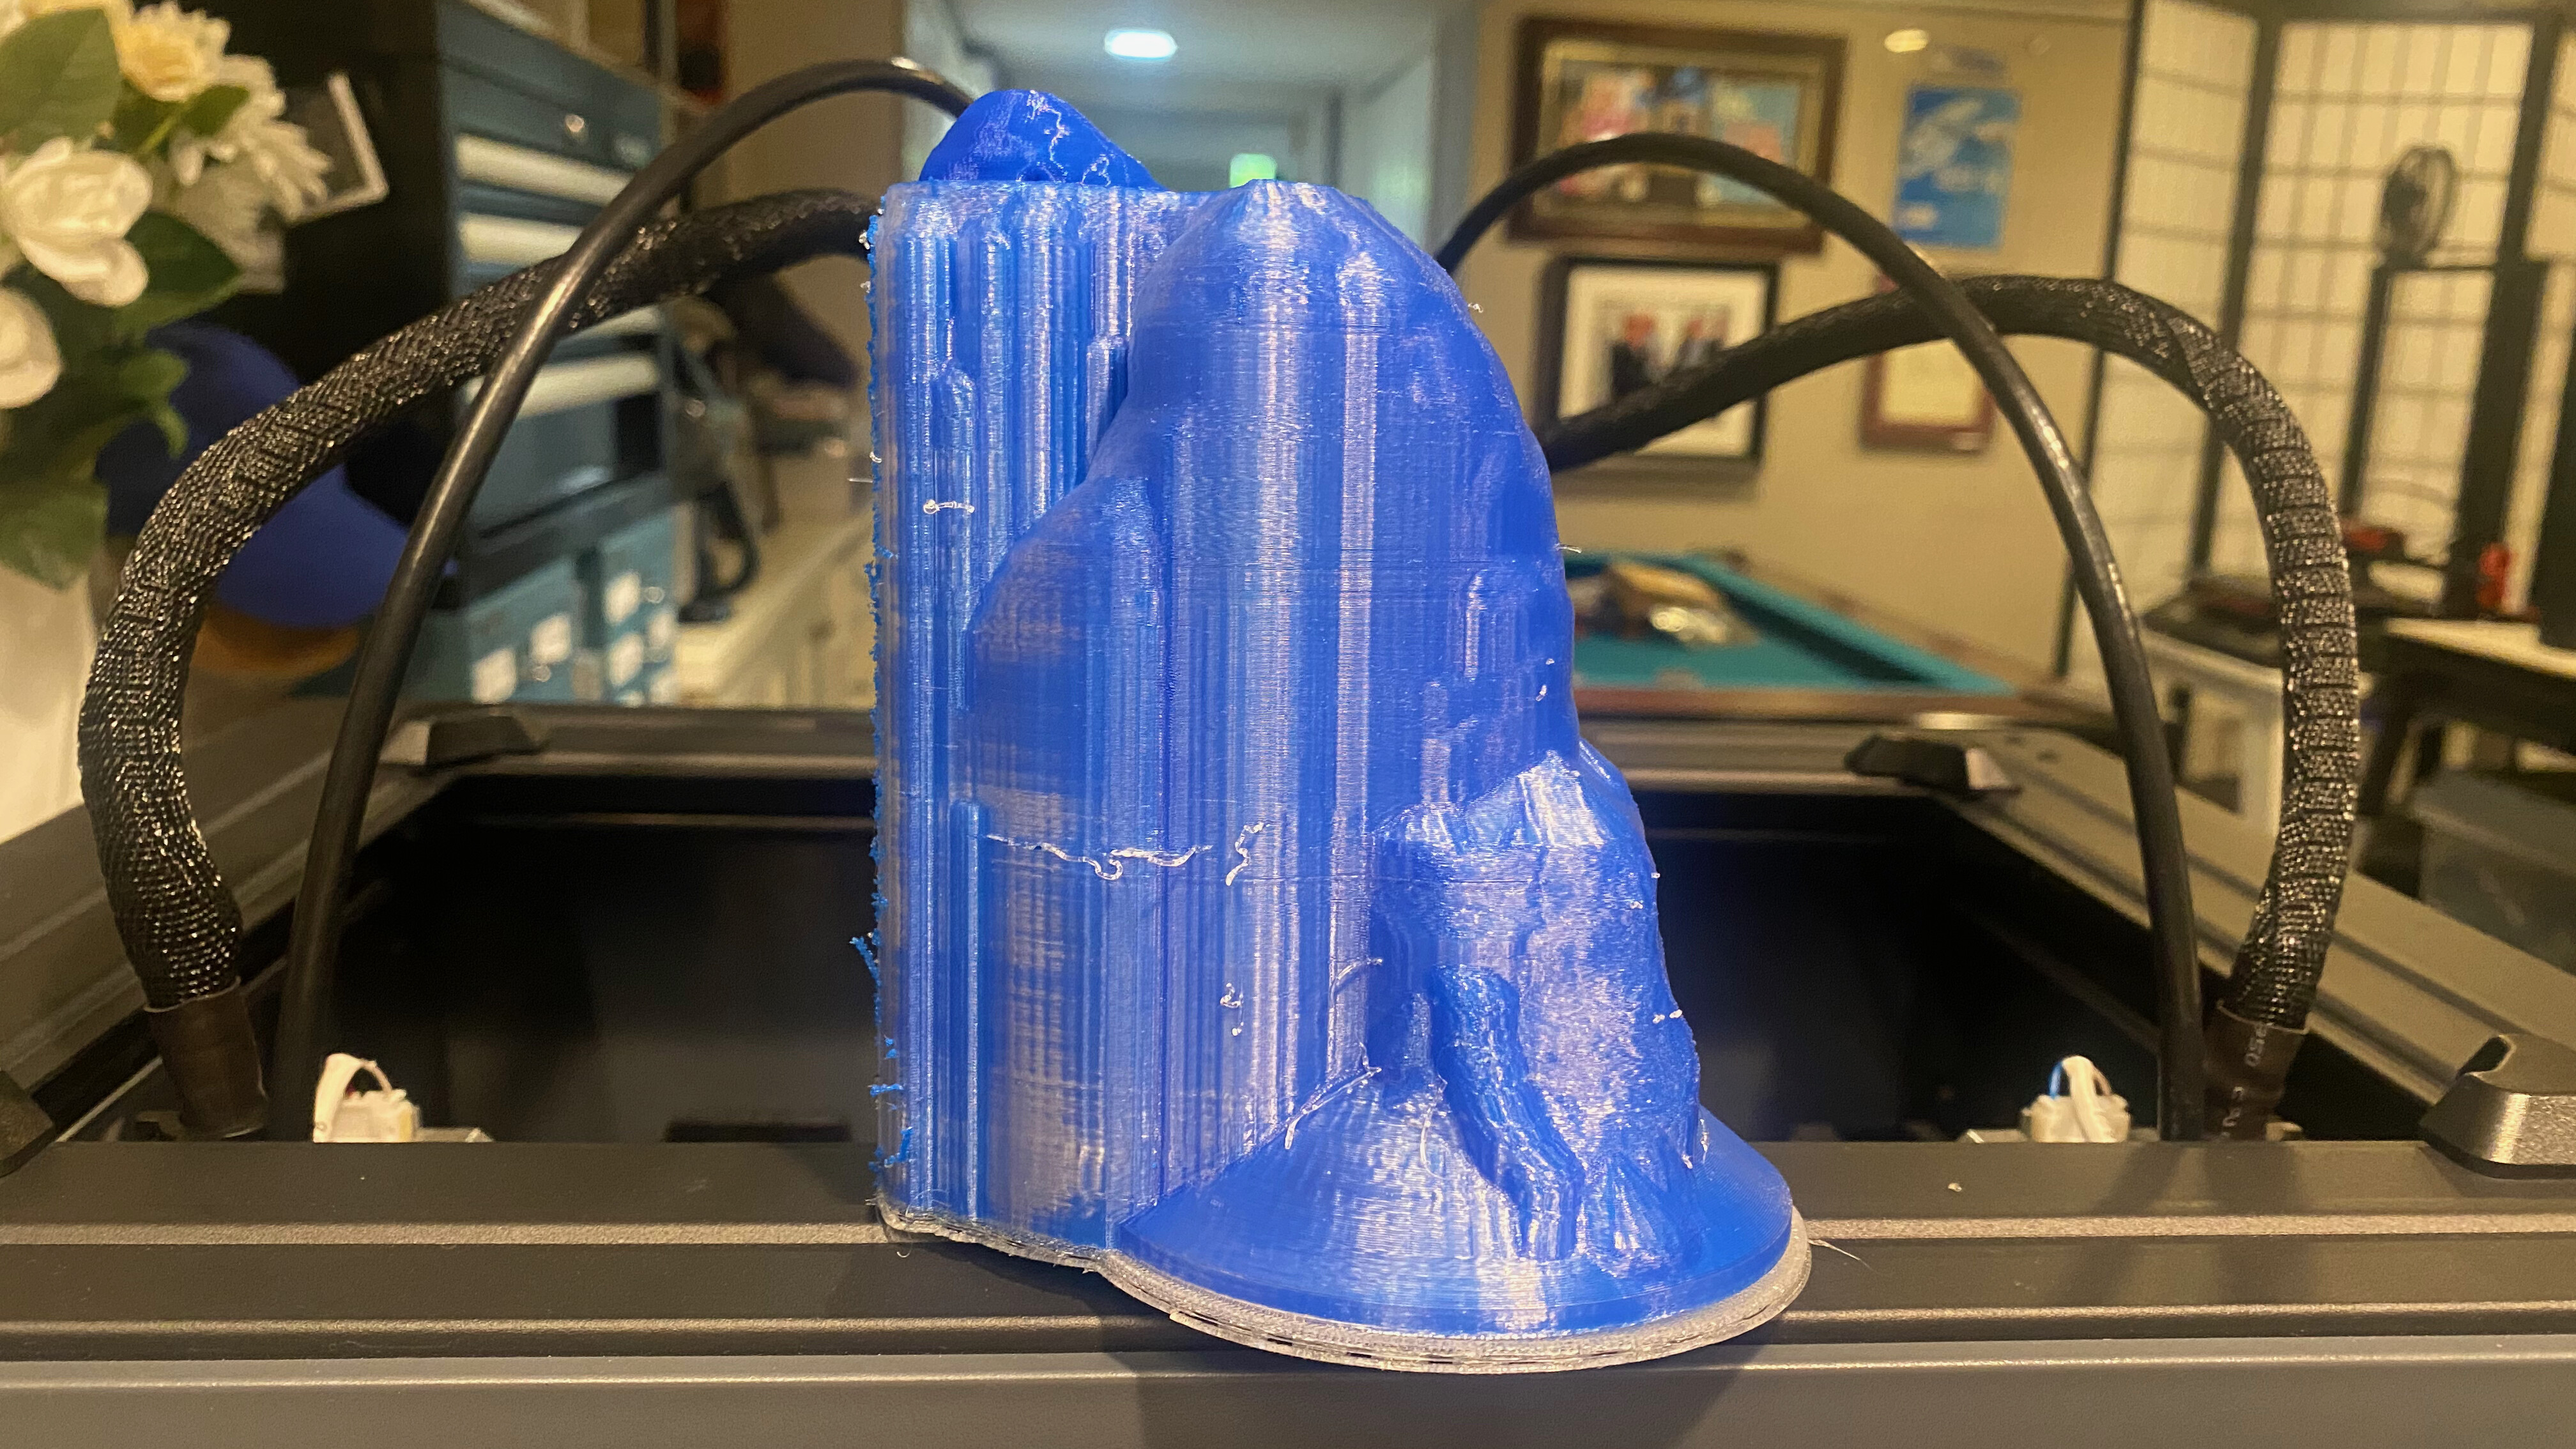
One disadvantage of an ooze wall is it makes it hard to see anything. From the side you just see a solid object:

[ATTACH=JSON]{“alt”:“Click image for larger version Name: IMG_5815.jpg Views: 0 Size: 993.8 KB ID: 10487”,“data-align”:“none”,“data-attachmentid”:“10487”,“data-size”:“custom”,“height”:“288”,“title”:“IMG_5815.jpg”,“width”:“512”}[/ATTACH]

There are very nice lights inside the printer (which is fully enclosed with a clear area in the door), and the blue print surface makes everything look blue. This video is at actual speed. I did not speed it up or slow it down. The printer is not quite and clearly, does not have the most recent stepper motor drivers.

Here is a video from the top:

[video=youtube_share;nAMPuFQaDT4]FlashForge Creator Ooze Wall - YouTube

It will take me a few days to print enough samples for a reasonable review, so expect a video at the end of this week or early next week.

Irv

Looks like a really nice printer &, yes, it does seem fast.

My first print completed and the quality is quite good. Here are a couple of photos to let you see what I saw. This first photo is the completed print in its “cocoon” which is my name for the wall because it looks like a caterpillar in a cocoon.

[ATTACH=JSON]{“data-align”:“none”,“data-size”:“custom”,“height”:“281”,“title”:“IMG_5818.jpeg”,“width”:“500”,“data-attachmentid”:10507}[/ATTACH]

Now here is the print before any clean-up. Really not too bad, just a bit fuzzy with very slight stringing. I was able to just brush off the strings with my finger. The cocoon does not touch the print so it comes right off.

[ATTACH=JSON]{“data-align”:“none”,“data-size”:“custom”,“height”:“281”,“title”:“IMG_5820.jpeg”,“width”:“500”,“data-attachmentid”:10508}[/ATTACH]

Here is the cleaned-up print.

[ATTACH=JSON]{“data-align”:“none”,“data-size”:“custom”,“height”:“281”,“title”:“IMG_5822.jpeg”,“width”:“500”,“data-attachmentid”:10509}[/ATTACH]

For some reason, the back is even better with no color bleeding.

[ATTACH=JSON]{“data-align”:“none”,“data-size”:“custom”,“height”:“281”,“title”:“IMG_5821.jpeg”,“width”:“500”,“data-attachmentid”:10510}[/ATTACH]

More in the next post since I exceeded the images per post limit …

Some additional early observations. The defaults in FlashPrint, the FlashForce slicer, are designed to minimize user errors. For example, it defaults to a raft. It is interesting that the raft is heavily over extruded which makes it a bit hard to take off but ensures your print will not fail. I tried printing some calibration cats which are quite small but only touch the bed at the four legs and without a raft they did not stick. This will require some more experimentation.

The slicer has similar features to ideaMaker for cutting and aligning prints. It also has a built-in Lithoprint capability. Auto supports and the ability to delete supports are the same as ideaMaker but the add manual support option is a bit finicky. By default, ALL supports use a tree structure. Here are some pictures from the slicer.

[ATTACH=JSON]{“alt”:“Click image for larger version Name: Screen Shot 2021-06-01 at 8.03.56 PM.png Views: 1 Size: 968.8 KB ID: 10512”,“data-align”:“none”,“data-attachmentid”:“10512”,“data-size”:“custom”,“height”:“281”,“title”:“Screen Shot 2021-06-01 at 8.03.56 PM.png”,“width”:“499”}[/ATTACH]

[ATTACH=JSON]{“alt”:“Click image for larger version Name: Screen Shot 2021-06-01 at 8.25.15 PM.png Views: 1 Size: 1.66 MB ID: 10513”,“data-align”:“none”,“data-attachmentid”:“10513”,“data-size”:“custom”,“height”:“281”,“title”:“Screen Shot 2021-06-01 at 8.25.15 PM.png”,“width”:“500”}[/ATTACH]
[ATTACH=JSON]{“alt”:“Click image for larger version Name: Screen Shot 2021-06-01 at 8.31.11 PM.png Views: 1 Size: 1.56 MB ID: 10514”,“data-align”:“none”,“data-attachmentid”:“10514”,“data-size”:“custom”,“height”:“281”,“title”:“Screen Shot 2021-06-01 at 8.31.11 PM.png”,“width”:“499”}[/ATTACH]

A couple more observations. The two-color prints were with a printer that was calibrated correctly from the factory. This is impressive.

The utility functions built into the slicer are very similar to the PrusaSlicer with a Prusa Printer. Unlike PrusaSlicer the USB support is complete and you can print directly from the slicer. You can also control the printer functions from a control panel in the slicer and update the printer firmware from the slicer.

FlashPrint does have a very primary completely optional cloud capability. Not sure how it works yet.

I need to verify this, but I think the printer is sailfish based which is different from marlin but shares the majority of gcode options.

All of the most advanced functions are handled by Flashforge, for example, you do not specify auto park for the IDEX, gcode start or end code, jerk, acceleration, or linear advance, all which are supported under the covers based on the slicer and firmware release notes.

Watching the temperatures on the front panel the temperature control is outstanding.

Starting a 12-hour print.

More to learn …

Interesting about the color bleeding. Except for that it is, as you say, pretty nice quality. Looking foreward to more.

I have completed most of the test prints I wanted to try before producing the video. Here are some more images:

[ATTACH=JSON]{“data-align”:“none”,“data-size”:“custom”,“height”:“281”,“title”:“IMG_5827.jpeg”,“width”:“500”,“data-attachmentid”:10517}[/ATTACH]

Notice the clean white areas. No stringing issues.

[ATTACH=JSON]{“data-align”:“none”,“data-size”:“custom”,“height”:“281”,“title”:“IMG_5829.jpeg”,“width”:“500”,“data-attachmentid”:10518}[/ATTACH]

It was impossible to fully remove the raft. I would have to sand off. Next time I need to make the raft the same color as the touchpoints.

It may be that the slicer is assuming you will use dissolvable filament for supports and rafts so it makes them rather heavy.

[ATTACH=JSON]{“data-align”:“none”,“data-size”:“custom”,“height”:“281”,“title”:“IMG_5830.jpeg”,“width”:“500”,“data-attachmentid”:10519}[/ATTACH]

Now I am going to try a print with dissolvable supports.

Wouldn’t it be nice if it has the ability to only use the expensive dissolvable filament for the last 1 or 2 mm closest to the model. I believe Simplify3D has this feature.

A 12 hours print with disolvable filement. Very impressive results. I found that some of the supports popped off when I removed the wall/shell around the print. The raft snapped right off without difficulty. Then I soaked the print in warm water for about 2 hours. When I removed it the supports had not detached but were now jelly-like and I was able to wash them off in hot running water. Then I used a toothbrush to clean off leftover material. The whole process was easy, clean, and very rewarding.

FlashPrint is able to use tree supports that go from one part of the model to another. This print did not require supports down to the print surface.

[ATTACH=JSON]{“data-align”:“none”,“data-size”:“custom”,“height”:“281”,“title”:“IMG_5839.jpeg”,“width”:“500”,“data-attachmentid”:10528}[/ATTACH]
[ATTACH=JSON]{“data-align”:“none”,“data-size”:“custom”,“height”:“281”,“title”:“IMG_5840.jpeg”,“width”:“500”,“data-attachmentid”:10529}[/ATTACH]

[ATTACH=JSON]{“data-align”:“none”,“data-size”:“custom”,“height”:“524”,“title”:“IMG_5841.jpeg”,“width”:“500”,“data-attachmentid”:10530}[/ATTACH]

[ATTACH=JSON]{“data-align”:“none”,“data-size”:“custom”,“height”:“520”,“title”:“IMG_5848.jpeg”,“width”:“500”,“data-attachmentid”:10531}[/ATTACH]

The cooling and on the printer is excellent and the overall quality of this print at .18 fixed layer heights is outstanding. FlashPrint also supports variable layer heights. I used the Flashforge supplied blue PLA and 3d Print Life Biodegradable PVA.

Now it is time to turn on lights, microphone, and camera(s) and make a video.

I must say, the cocoon concept is interesting, but the dissolvable filament is even more interesting. The raft does seem to use a minimum of material. The photo of the figure with the dissolvable filament remnants makes him look like he’s part of a horror movie.

The slicer appears to use the dissolvable filament for the entirety of the supports, rather than the millimeter or 2 closest to the model. Looking forward to the video.

It took a lot longer to edit this video and I found after multiple takes that my close-up camera was out of focus so I had to use photos instead but I found this review very interesting.

The specifications of Artist-D Pro are superior to the specs of the Creator Pro 2 with a significantly larger print area. However, Flashforge has done a masterful job of making an IDEX 3d printer easy to use. The calibration wizards built into the firmware, the tight integration of the Flashprint slicer, the complete USB to Flashprint support, and the quality assurance added at the factory make this printer a true “toaster” as Ender5r has stated in another post.

I think both of these printers have a place in the 3d printer marketplace and I can see recommending each of them depending on the user’s requirements and skills.

Because this printer is quite fast I will probably use it as my day-to-day printer anytime my model will fit in its build volume.

Enjoy the review and look for a forum contributor shout-out towards the end of the video.

[video=youtube_share;f4Emb1ljWGo]IDEX 3d Printer Review | Flashforge Creator Pro 2 - YouTube

A very good revue. I’m surprised how noisy it seems compared to my old ender 3 pro.
It would be interesting to see soluble supports with some kind of gear mechanism or other mechanical part.

Thanks for the shout-out. ?

A thought came to me as you were talking about the ways to communicate with the printer: does it work with OctoPrint?

I just watched an interesting video on converting an Ender 3 into an IDEX printer. It was the final few seconds of the multipart video that I really realized that it wasn’t for me at all. I realized that it was printing with a wipe column as big as the print. Ender 3 IDEX: DIY Dual Extruder X-Carriage 3D Printer Installation Kit by SEN 3D - YouTube It does have a 32 bit board but doesn’t mention what kind of print surfaces you end up with for dual or single. I think they cost $179 can delivered.